Products
Solutions
|
|
|
TS250 dispenser training guide and setting up Last Updated: 01/01/2012 |
|
A New Dimension to Bench-top Fluid Dispensing
PRODUCTIVITY-ENHANCING DIGITAL
TS250 Series
Safety Precautions
� Do not operate this unit in excess of maximum ratings/settings � Always wear appropriate personal protective clothing or apparel � Use only approved power adaptor models:
? PSA15R-240P(ZJ) ? PW118RA2403B01 ? PW118RA2403H01 ? PW118RA2403M01
Symbol Definition
 Pressure: Regulate air pressure Pressure: Regulate air pressure
Specifications
� Input Voltage: 24 VDC � Maximum Air Output Pressure: � TS250 = 100 psi (6.9 bars) � TS255 = 15 psi (1.0 bars) � Vacuum Force: 16� (406mm) of Hg � Timer: 0.020-60 seconds � Repeat Tolerance: +/- 0.001% � Cycle Mode: Continue, Purge (Manual), Interrupt � Cycle Rate: 600 cycles/minute
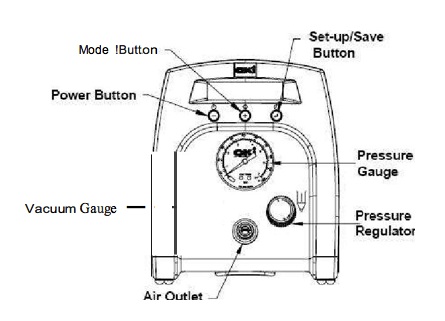
Features- Front View
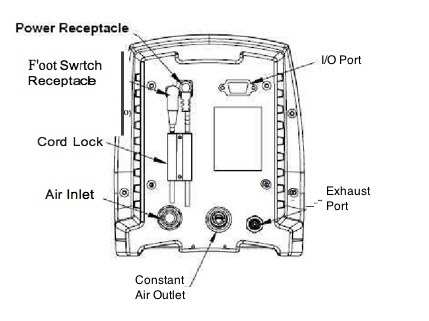
Features- Rear View
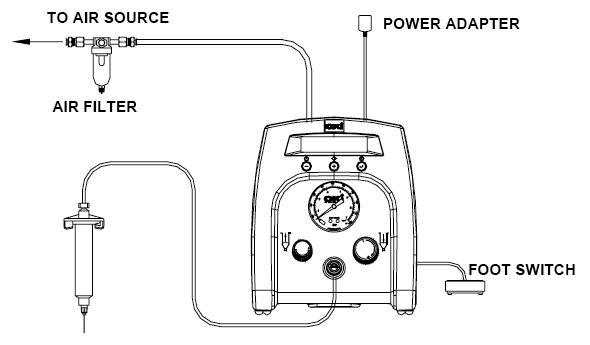
Typical Connection
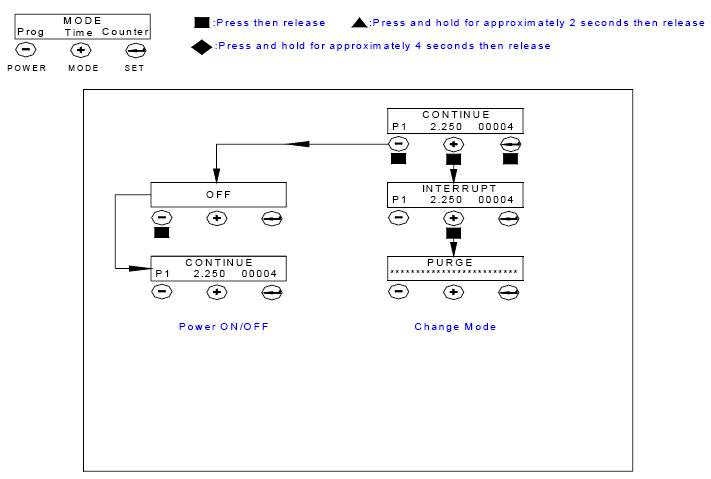
Operation Modes and Display Indicators
� Mode = A process that performs a specific action or a group of actions that results in an expected outcome
Setup- Operation Diagram (Mode Selection)
Setup- Operation Diagram (Time & Counter Setting)
Setup � Purge Dispense Cycle
1. Press Power Button to turn on unit 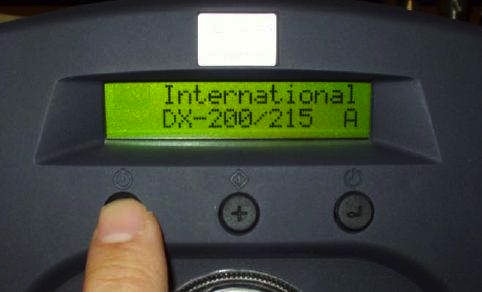
2. Press Mode Button to select
�Purge/ manual� Mode
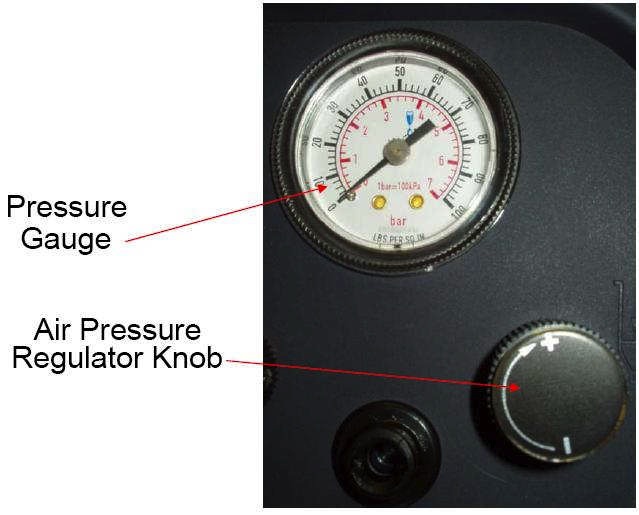
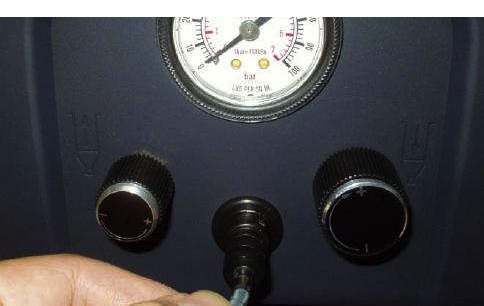
3. Rotate Air Pressure Regulator
knob clockwise (CW) until desired
pressure is
indicated on the pressure gauge
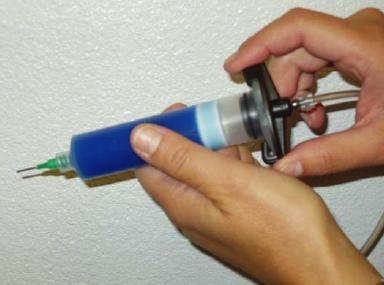
4. Attach Receiver
Head Assembly to syringe.
5. Connect plug end of
Receiver
Head Assembly to air
outlet
6. If vacuum �suck back� is needed, rotate Vacuum Control Knob 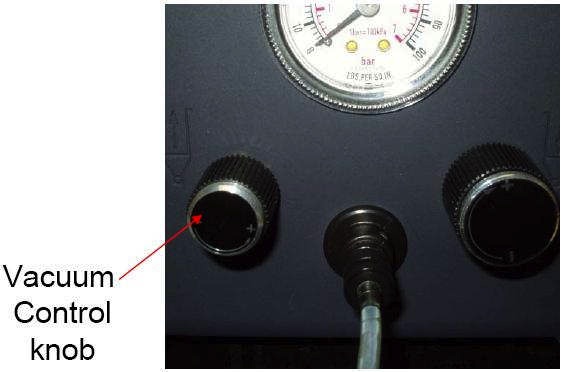
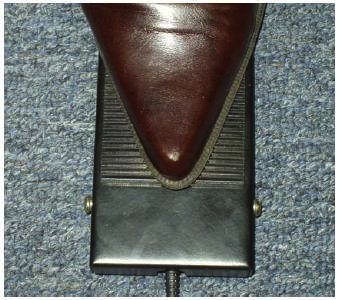
7. Depress Foot Switch to activate dispense cycle
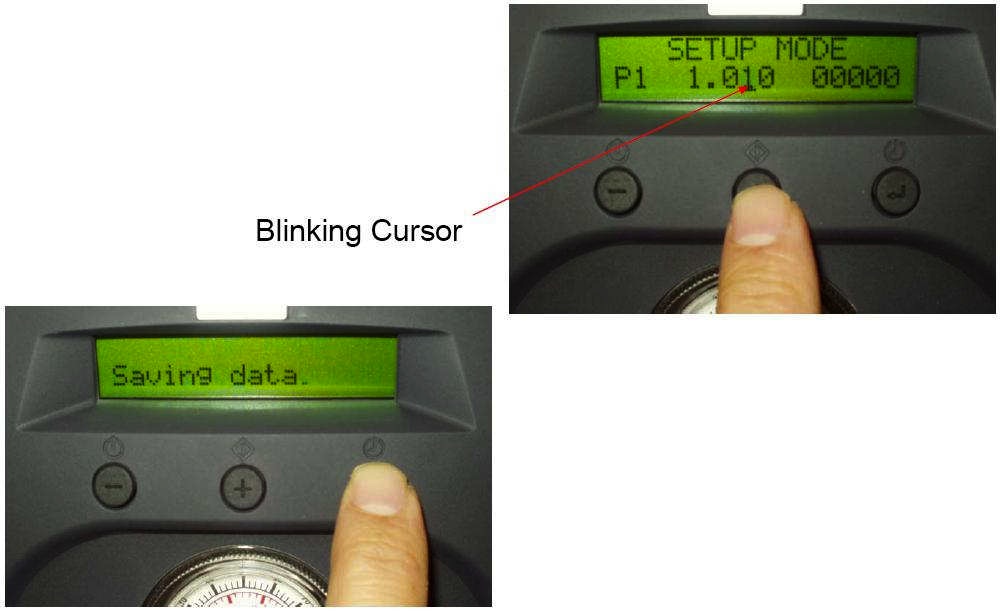
Setup � Auto Dispense Cycle: Time Setting
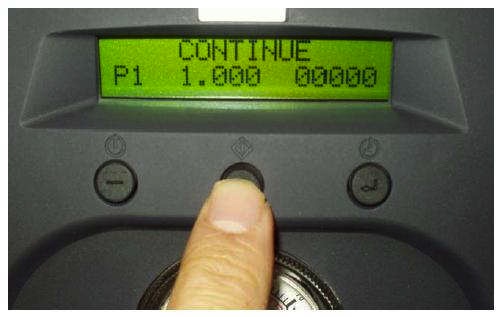
1. Push Mode Button to select �CONTINUE� or
�INTERRUPT�
Mode
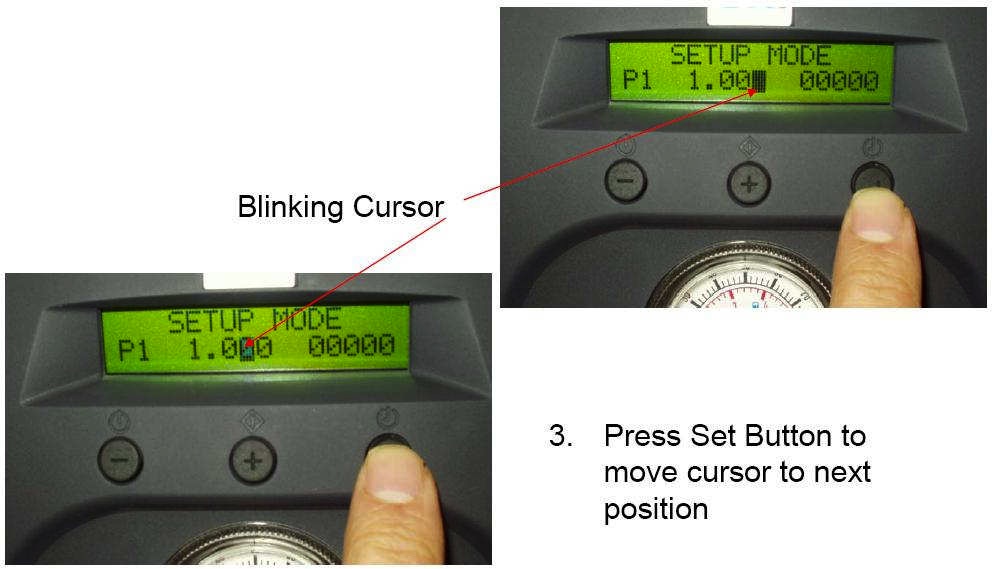
2. Press and hold Set Button for 2 seconds to enter �Setup� Mode (the last digit is highlighted with a blinking cursor)
4. Press (+) or (-) Activation Button to set desired dispense time
5. Press and hold Set Button for 2 seconds to save data
6. Depress Foot Switch to activate dispense cycle 
Cycle Counter Reset
To reset counter: Press and hold Set Button for 2 seconds to enter Setup Mode then press and hold Set Button for 4 seconds to reset
Up to 65,535 cycles can be recorded 
Troubleshooting
LCD does not light - No power input: check power connection: turn on power
Unit will not actuate - Foot Switch not plug in or loose: check Foot Switch connection - Defective Foot : replace Foot Switch - Loose connection inside unit: check for broken wires or loose connec- tions - Defective solenoid: replace solenoid - Defective PC board: replace PC board
Unit will not pressurise - Insufficient air pressure: increase air pressure - Air hose not plugged in: check air connection - Defective air regulator: replace air regulator
System will not pull vacuum - Vacuum setting is too low: increase vacuum setting - Defective venturi: replace venturi - Defective needle valve: replace needle valve
Inconsistent dispensing - Air bubbles in adhesive: remove air bubbles, decrease vacuum setting - Dispense time is too low: increase dispense time - Dispense needle tip starting to clog: replace dispensing tip
Maintenance
- Make sure air supply is clean and dry - recommend using an air filter such as part # TSD800-6
- Avoid connecting air supply in excess of 100 psi (6.9 bar) for TS250 and 15 psi (1.0 bar) for TS255
- Avoid turning barrels upside down or laying barrel so that mate- rial may run through airline to internal components - use inline filter for adapter # 881-000-000
- Use amyl alcohol to clean surface of unit housing
- Use soft cloth to clean LCD display
I/O Configuration - End of Cycle Switch
Pin Function
-
Pin 1 = voltage initiate + (5-24VDC)
Contact Information
TS250 and TS255 covered by 1 Year manufacturers warranty
Adhesive Dispensing Ltd
Tel. 0845 652 0058 |


 V
V